 Skip to content

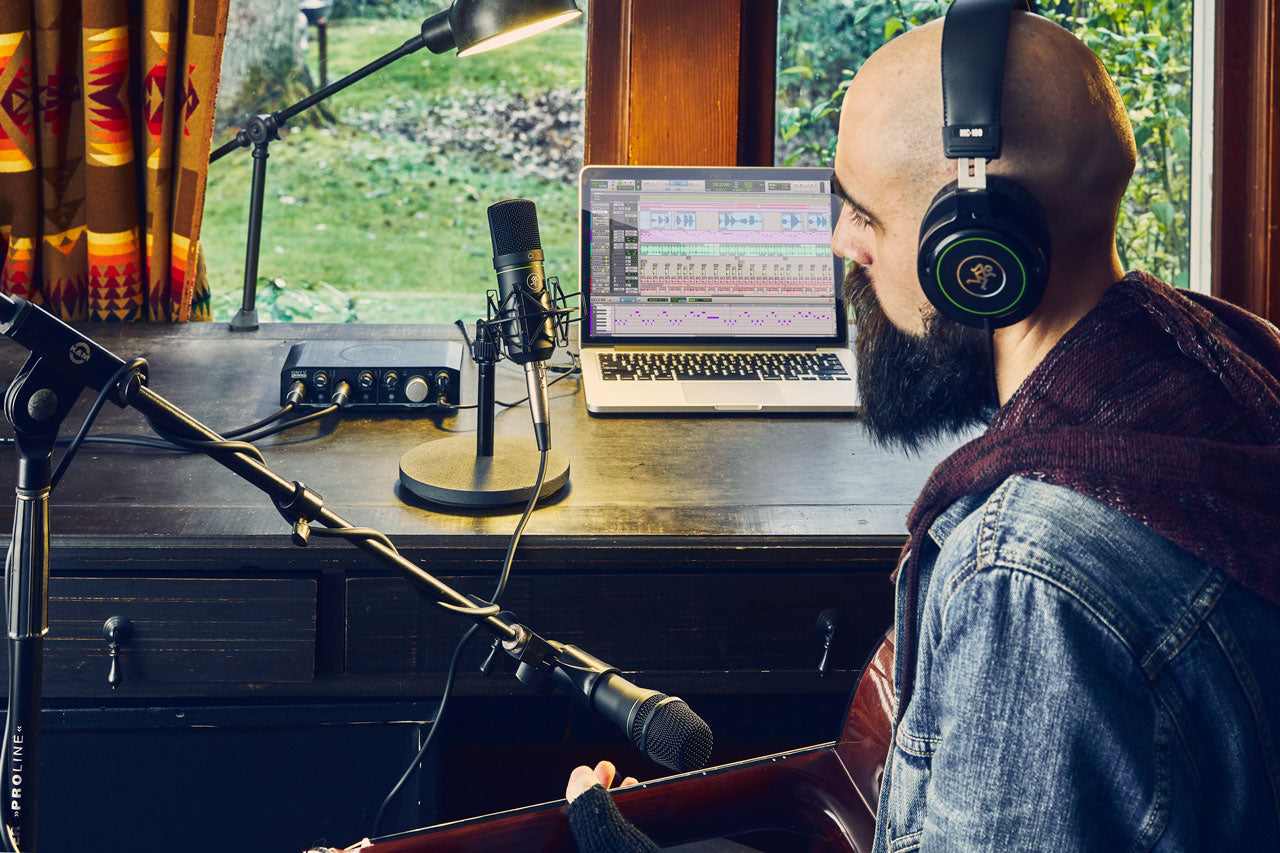
What does an audio interface do?
An audio interface allows the user to record and playback audio from a computer, sounds simple right? It can be once you know a little about how to choose the right audio interface for what you're doing.
The built-in computer audio is pretty good sometimes but a professional USB Audio Interface will sound way better and allow you more options for recording and playback. A 2 channel USB audio type interface is what many DJ’s and personal home studio’s use for professional recording at home.
The job of the audio interface is to take an audio signal and translate that into your computer through what’s called an A/D Converter. This converts the sound you hear using a microphone and cable into the interface into 1’s and 0’s that represent…sound! Then that digitized sound can be stored, edited and mixed on your computer. The last job of the interface is playback back out of the computer to your monitor speakers reversing the process through something called D/A conversion.

Audio Interfaces allow you to connect things like microphones and guitar cables to a computer and record via USB most commonly. It also has outputs typically and allow Studio Monitor Speakers, computer speakers or headphones to listen to the recorded or real-time incoming audio to play through the computer.
This article is intended to help beginner and intermediate recording and DJ enthusiasts learn about audio interfaces and learn how to select the perfect interface for their needs.
How to use an audio interface
The basics of setting up and using a basic audio interface start with:
- Connecting your interface to your laptop or desktop computer via USB or recommended connection
- Install the necessary or recommended drivers, sometimes this is automatic with newer systems but you might need to download a driver
- Connect your powered speakers to the outputs of the audio interface
- Install/Launch your audio recording or playback software
- Specify the output of your audio software to route to your newly installed audio interface
- Test by playing back some pre-recorded audio from inside your software
- Hook up your inputs like microphones and ¼ inch guitar cables etc. to the interface
- Test your input signal by routing an input channel to an input in your software and recording a short clip.
- Play it back through your speakers for a victory lap, yeehaw it’s working! If it’s not working start over or…call your favorite computer geek buddy to assist, make sure to have some mountain dew on hand, they love that stuff.
What is the best audio interface?
How to choose the right usb audio interface for what you’re doing is the better question. It can be a complex decision but we can use some basic principles to narrow down the search.
How many channels will you be recording at one time? Since the price and size of audio interfaces for recording goes up significantly with the number of simultaneous inputs, this is key. Audio Interface manufacturers reference this by the term I/O for in and out.
If you’ll only be recording two tracks at a time or are running a small personal studio 2 to 4 input tracks is usually plenty. If you’ll be recording a full band or many inputs at once you’ll want to consider a more powerful dedicated audio interface that is rack-mounted and has 8-24 or more I/O or inputs and output channels.
Audio Interface for use with a midi keyboard or midi controller?
Most high-end audio interfaces will have an onboard midi connection so you can hook up your keyboard or DJ controller to your computer through the audio interface. This saves you from having to purchase an additional midi interface for your laptop and is more streamlined. 
Make sure if you think you’ll be using a midi controller to get an interface that has that built-in.
Are you recording vocals on top of music? Audio Interface latency issues and concerns, what you need to know
If you are recording vocals regularly you’ll want to make sure you get a high-end audio interface that states 0 latency. Latency is the delay between live and playback audio.
Latency sounds like a little slapback when you’re recording your vocal and it sucks. This will quickly become annoying and it makes it really hard to record a decent vocal track. If you aren’t doing overdub tracking with a multi-track system this isn’t as big of a concern.
Just remember if you want a 0 latency interface if you’ll be doing overdub vocal tracks with music etc. Also, if you have an average performance PC or older PC make sure to get a nicer audio interface that has more onboard CPU so it can take the load off of your PC or MAC for smooth sailing.
To fix the latency issue try reducing the buffer size setting in your software setup. If you have a slow computer you might find your computer will run out of processing power as you reduce the buffer size and errors will happen. If this is the case you’ll need to get a better audio interface or get a better computer or throw them both out the window and get an old school reel to reel recording, lol.
Types of Audio Interfaces
There are two main types of audio interfaces. Desktop and rackmount.
Desktop Audio Interfaces for Podcasting or Personal Use
These are great for project studios or DJ setups where you only need 2 to 6 tracks of audio. These will have audio monitoring controls and headphone jacks on the front for desktop use. In this article, we're primarily discussing the popular and much smaller desktop units.
Rackmount Audio Interfaces for Project Studio or Professional Recording Studio Applications
Rackmount audio interfaces are more geared for serious recording with more horsepower and are more specialized. They often won’t have as much control on the front of the unit as it’s not intended to be controlled with buttons and knobs like a desktop unit but controlled by a computer using DAW software. These units are more geared for serious recording studios where you’re recording full bands with lots of inputs at the same time which takes much more processing power and you can record at higher sound quality settings or bit rates with more dynamic range.
Audio Interfaces for Podcasting
There are a few ways to go these days depending on your budget and quality you’re looking for.
For a really low budget entry-level podcast recording setup, you can use a USB Microphone that has a built-in simple Audio Interface. 
The Shure MV5 USB Microphone is shown above and can connect directly to your laptop or desktop computer for simple setup and pretty decent results for a one mic setup.
These mics are super easy to set up and a great way to get started recording simple stuff like basic podcasts. The recording/sound quality of the all in one type podcast microphones will vary quite a bit and the prices range widely.
If you’ll be podcasting a show if you ever think you’ll be having guests on your show…you’ll want to have multiple inputs for your podcast audio interface. In this case you’ll step up from the USB mic and go with a 2 channel Audio Interface or a simple USB Mixer with multiple inputs that hooks up to your computer via USB. With multiple channels, you can record multiple separate tracks to control mixing and you’ll have way more flexibility with editing and finishing it up right.

The Behringer Xenyx Q502 USB 5 Input USB Mixer Audio Interface pictured above is a great way to get started with multiple inputs right into your computer's USB Port.
The drawback to many USB mixers is that you don’t always have multiple channels routing into your software. This is mainly an issue where you want to record more than 2 channels at a time on different tracks in your software (like I mentioned above in the guest podcast scenario).
For example, you may have some friends over to play guitar, piano and some vocals. With a USB mixer that only records 2 stereo outs, you’ll only be recording 2 tracks at a time so you can’t record everyone together on separate tracks. You can, however, record each performer or set of 2 tracks individually, but you can’t all play at the same time and have them be split tracks on your computer to mix later individually. 
With just 2 outputs to the laptop, you’ll be mixing everyone together as they are recorded into the computer with no split tracks which really limits your options for mixing and blending with effects later.
What’s a great podcasting Audio Interface? I’m glad you asked, check out the Mackie Onyx Producer with 2 XLR input channels or Mackie Onyx Artist with just 1 XLR Mic input channel. For podcasting, you’ll want to use a desktop audio interface unit that has XLR inputs and at least some basic monitoring.
We love Mackie products at the shop, and their audio interface is really well built. They are continually innovating and always provide a great value.
These Mackie Onyx Producer units have really nice sounding Onyx preamps higher than average 192kz sample rate and take the load off your computer for smooth audio recording and playback. 
These are desktop units that have 0 latency with the option to monitor directly through the box. Even with monitoring through your computer, you won’t have latency issues. We recommend the Mackie Onyx Producer for high-quality podcast and general personal recording studio type applications where you’ll be overdubbing vocals and other instruments. 
The main speaker out monitoring volume and input gains control for the mics are located conveniently on the front as well as the headphone monitor volume. ¼ inch outputs on the rear feed your main monitor speakers. The Producer version offers Midi controller inputs which are very handy for personal studio use but if you aren’t hooking up a keyboard or DJ controller skip it and get the single-channel Mackie Artist Interface. Recognize that most of the other USB audio interfaces in this price range won’t have Midi inputs which are very handy for hooking up a keyboard or controller which is pretty standard these days.
Feel free to give us a call at the shop anytime with questions about audio interfaces for podcasting, USB microphones or USB mixers. They Hollywood DJ crew is happy to help you get set up right the first time 800-700-4542.